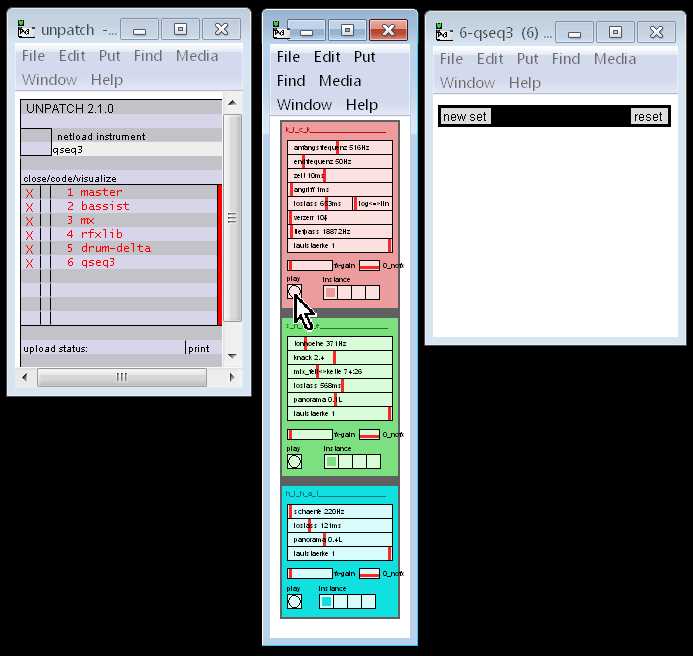
Open the drum machine called drum-delta and the sequencer called qseq3 (go back to the earlier tutorials if you have forgotten how to open patches/instruments).
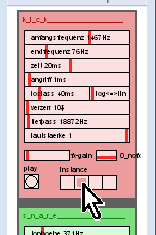
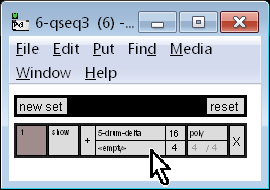
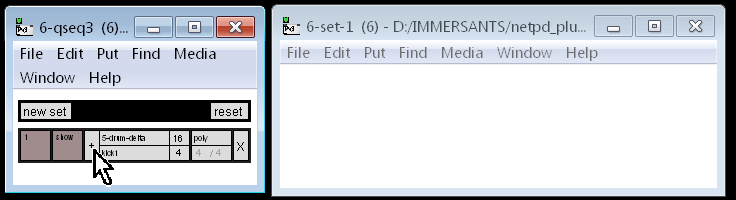
Then you should have the following. Unfortunately the font cannot be made larger. If you click on the play button as shown you will audition the kick drum default sound...
You could try experimenting with the settings (although they are in German, for now) but for now it is easier to use some of the default settings stored in four instances of the kick drum. You talready heard the first instance, now try the second instance (which you will notice it has different settings stored in it).
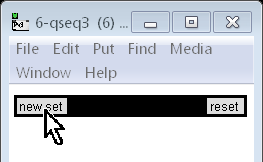
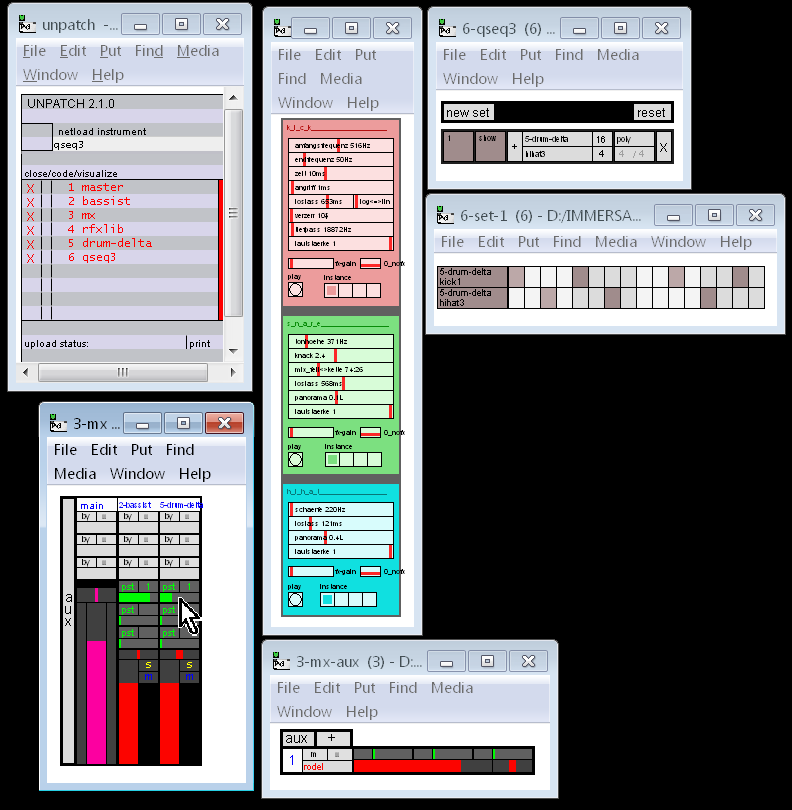
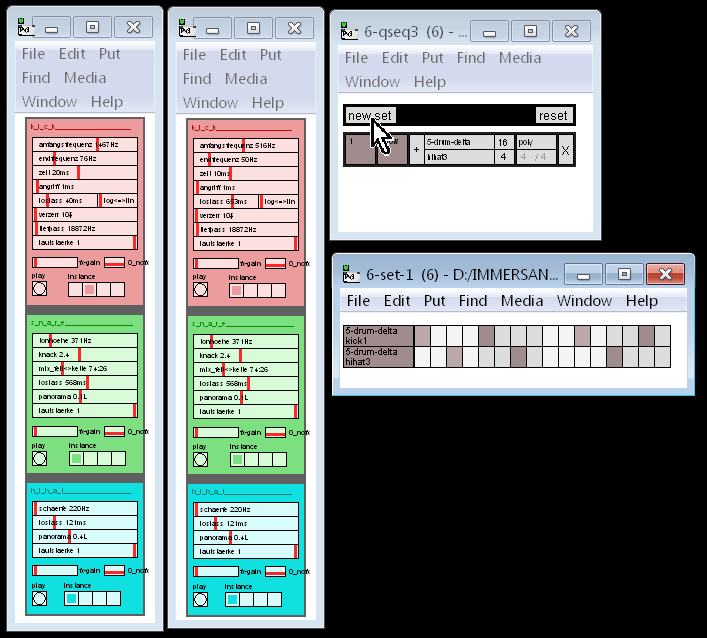
Similarly you can explore the snare and the high-hat before actually programming a rhythm. Unlike bassist and other melodic instuments which use their own dedicated built sequencer called jamx the percussion sounds all share a common sequencer which is only stores rhythm (not melody). You should already have the sequencer open in the window labelled q-seq3 (actually 6-qseq3 since it is the 6th patch we have opened). So next we will open a new set of rhythm-lines.
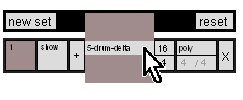
Then we select which patch/instrument (so far we only have one percussion patch opened, ie drum-delta)
Actually 5-drum-delta (since it is the 5th patch opened via the unpatcher).
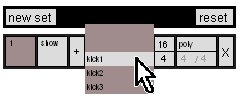
Now select which sound within that instrument we wish to sequence...
Let's go with the first kick instance, ie kick1 (recall from previous tutorial that we left-click and hold, then select by moving the mouse up and down but ignore the actual cursor, finally releasing the mouse button)
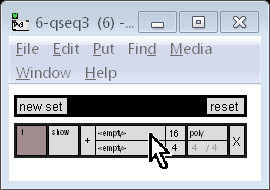
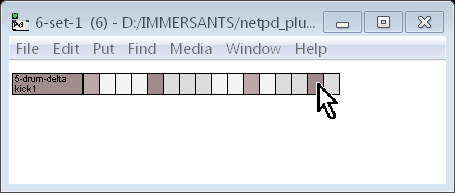
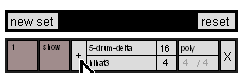
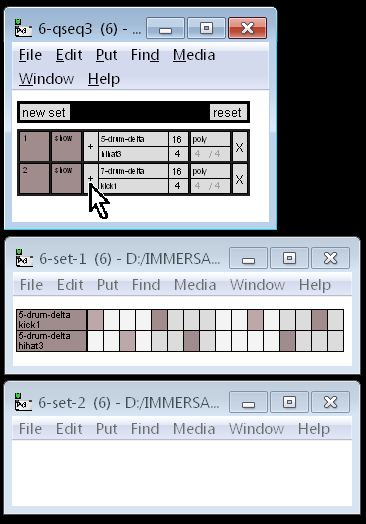
Now click to show the window where we can set out our rhythm (the window will be called set-1)
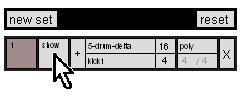
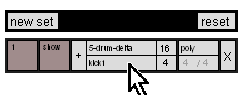
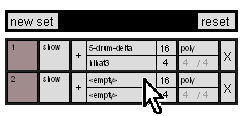
Now click the plus button to add a rhythm line into our accompanying set-1 window
Add a few notes (I've added four here)...
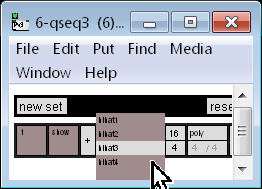
Choose another sound...
make it the third instance of the high-hats, ie the barely legible hihat3...
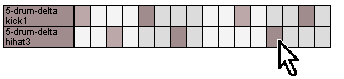
Now add a rhythm line for this new sound...
So a second line has appeared in our qseq3 window, and here I am adding three notes...
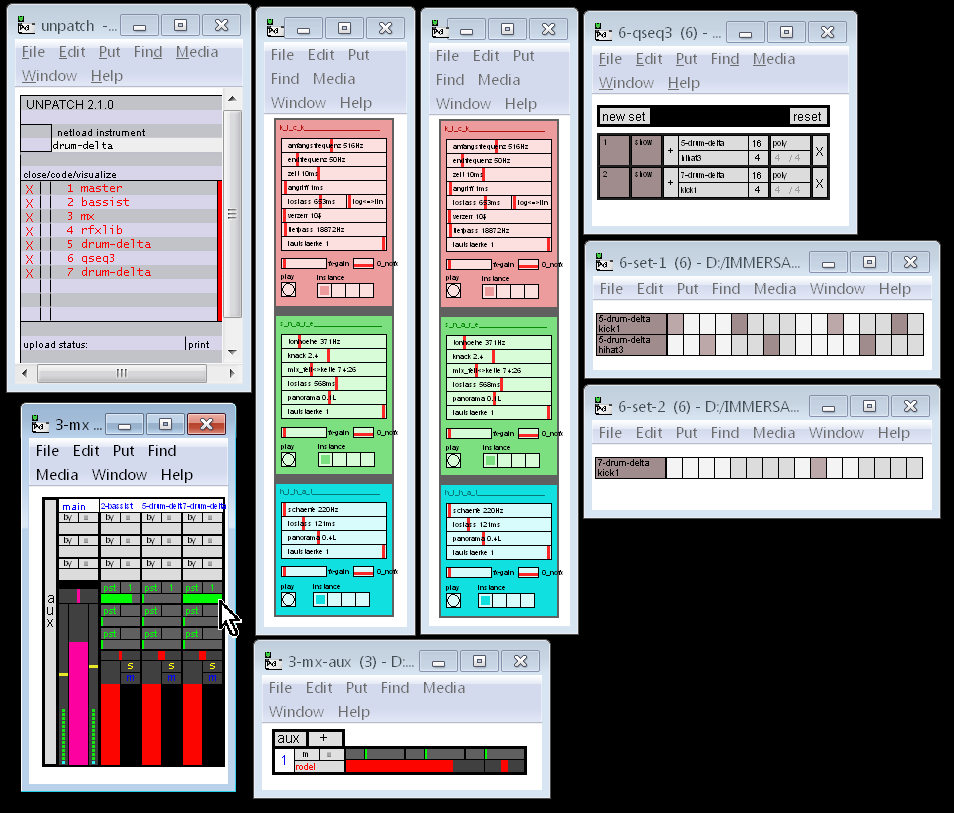
Now let's try applying FX on our new rhythm. First go to the mixer and set up the first slot of the 5-drum-delta channel's fx aux send...
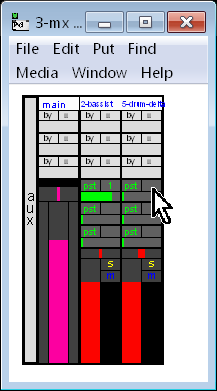
There is only 1 effect to choose from (we already defined it when we were treating bassist with fx)...
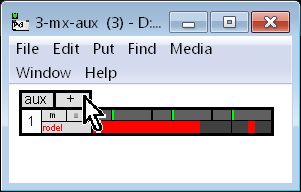
That effect we set in the previous tutorial is echo/delay (as you can see in the window mx-aux). Now experiment with the amount that is sent to this effect...
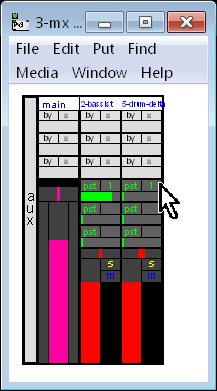
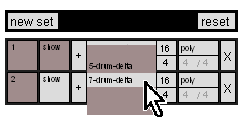
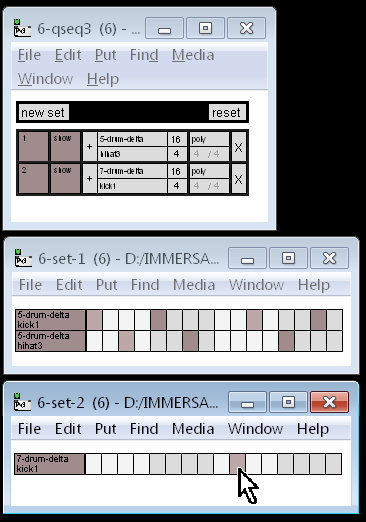
Pretty busy and messy sounding eh? So move the fx send slider back to 0% and we will create a copy of the drum machine which we will programme/sequence with a sparse rhythm...
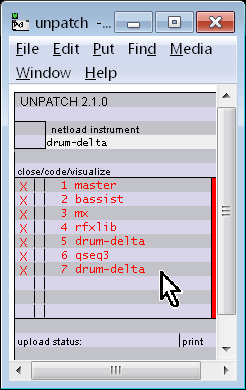
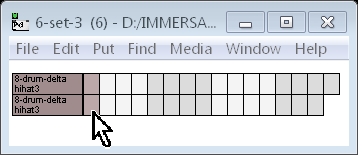
We don't really need to open up the window for this second drum machine since we won't be tweaking it; the default sounds will suffice again. However if you do open it, you will notice that each drum-delta window will have a slightly different name, corresponding to the name as listed in unpatcher (ie 5-drum-delta and 7-drum-delta). You don't see the window names because I have resized them neatly the next screen capture where I proceed to create a new set for the new drum machine.
 |
I could instead have just clicked + to expand the existing set but I wanted to keep what we have already done grouped together as a "dry" set (ie no FX) and have this new set as a "wet" set (ie with "FX").
|
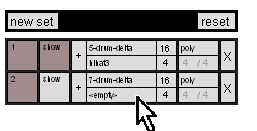
Now we have a second (for now, empty) set of rhythm-lines. As before, to create a rhythm line we first have to choose an instrument...
Now we will add a rhythm-line to this (as yet invisible) new set but first we must specify which drum-machine applies...
This time choose the second copy of drum-delta...
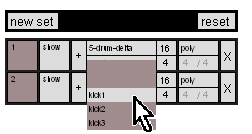
And the percussion sound within that instrument...
Yes, kick1 again (you will hear why soon)...
Let's show the window for this new set
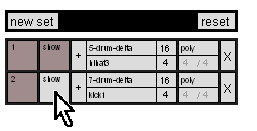
The window is empty until we add a rhythm-line
Just one note (we will soon apply echo to fill it out)...
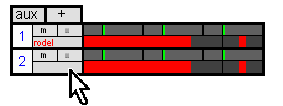
Now go back to the mixer and send this single kick note to rodel fx. Even 100% may not sound too busy this time.
Let's add a third drum machine. Rather than give scree-shots for each step, let me give them in point form:
All of which should be a familiar process to you, but now for something funky: specify a sequence that is not 16 ticks long. So click on the existing box with 16, keep the ouse button depressed...
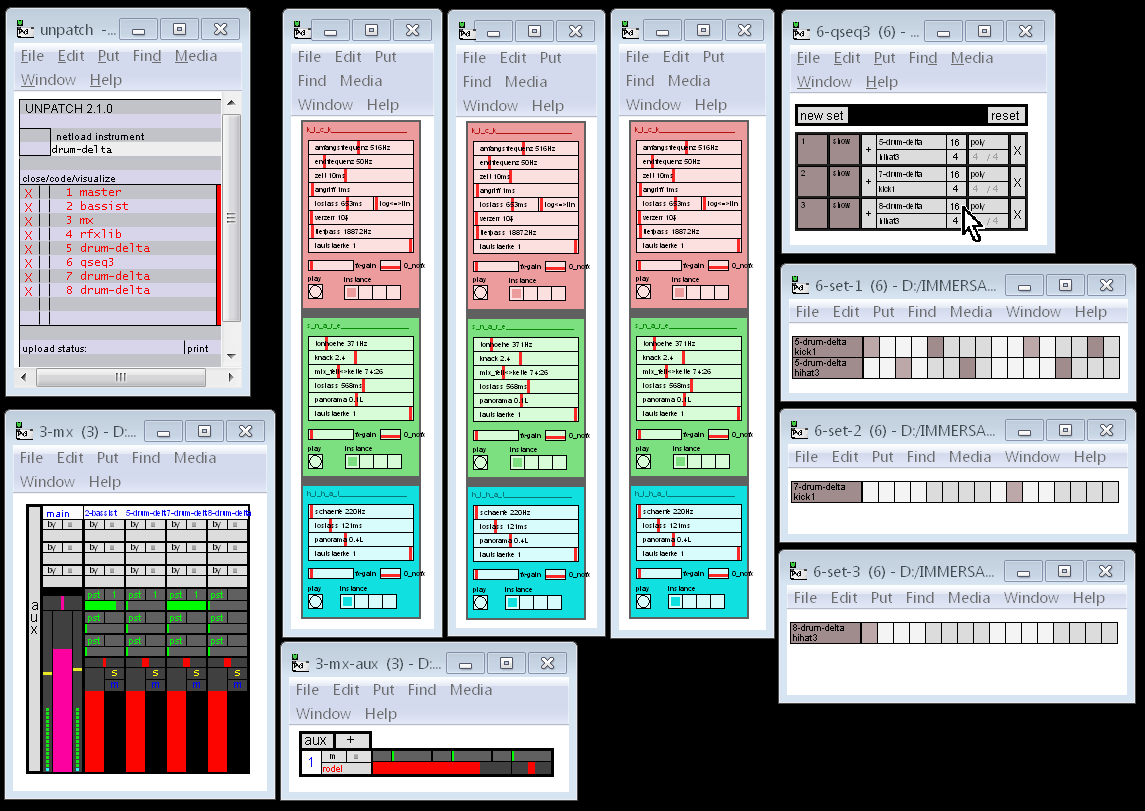
...and move the mouse down until 15 is highlighted, then let go of the mouse button...
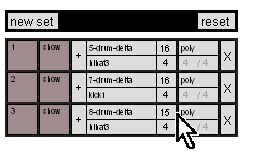
Then the + button, them add another hi-hat note on the first tick and listen to how these two rhythmically drift apart each loop iteration before we proceed to add effects to this...
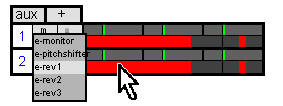
So we already have one library of FX (rfxlib) at our disposal (although we are only using the echo/delay). Open/unpatch the patch called e-lib (which is Eni's library of effects) because it has reverb which we will use. Now reverb (and heaps of other fx) will be available to us via the mixer. Recall from an earlier tutorial how we added fx. No pictures, this time but I will list the steps:
Go to the mx-aux window (if it isn't already opened then in the mx window, click on aux)
Click on the + button
Note below how the whacky selection process results in the cursor not even pointing to the selected effect...
Finally see the highlighted parts of the mixer below to add reverb to that hihat.

You may recall from the earlier tutorial that if you click on the highlighted button in mx-aux you can alter the parameters of that effect.
Congratulations, you are now ready to jump online and start jamming with others. It will be easy for experienced users to help in the chat room now that you have grasped all the concept of NetPD and the culture there is always one of sharing so don't be shy.